- Houdini

- 플러그인 설치

- Poly Reduce 를 적극 사용하자

- 필요한 MF가 없을 경우, 버튼을 누르고 해당 폴더를 Plugins 폴더에 붙여 넣어준다

- First Pass > Second Pass 순으로 렌더링 해준다
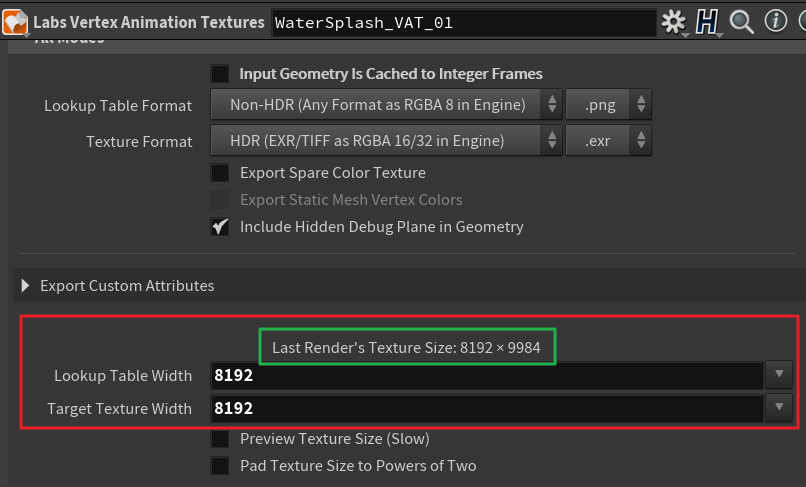

- Vertex 개수가 많다면 LookUp Table Width, Target Texture Width 의 크기를 늘려준다 (8K 까지 가능)
- Last Render's Texture Size 의 세로 픽셀이 10,000을 넘어가면 에러가 나는 것 같아보인다 (Preview Texture Size를 눌러서 확인 가능)
- Pad Texture Size to Powers of Two 를 체크하면 정사이즈 형태의 텍스쳐로 만들어준다(1k, 2k)

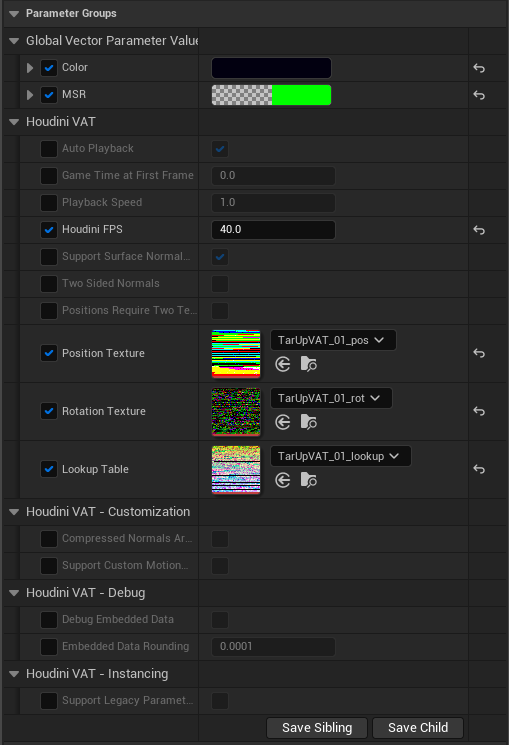
Color값이 필요없다면 빼도 좋다
I. FBX Import Settings
First:
Turn every toggle off.
Then:
Vertex Color Import Option: Replace.
Transform Vertex to Absolute: On.
Import Mesh LODs: On or Off, depending on if Export LODs is turned on in Houdini on the VAT ROP.
Normal Import Method: Import Normals and Tangents.
Import Uniform Scale: 1.0.
Convert Scene: On.
Override Full Name: On.
Material Import Method: Do Not Create Material.
Reorder Material to Fbx Order: On.
II. Texture Settings
1. In Content Browser, select multiple textures.
2. Rght-click on any selected textures and go to Scripted Asset Actions.
3. Select either "SideFX VAT Set HDR Textures" or "SideFX VAT Set Non HDR Textures"
to match what is selected on VAT ROP > Settings > All Modes > Texture Format.
4. Hit Ctrl+S on selected textures to confirm. You can quickly verify that the correct
settings have been applied by hovering your cursor above a texture and see if Filter
has been set to "Nearest". If it has, then everything else will have been set correctly too.
5. In Unreal Engine, sometimes there are issues with power-of-two textures that have
data in their alpha channels, in which case, consider using "SideFX VAT Set HDR Textures"
even if you exported those textures in non-HDR formats in Houdini.
III. Real-Time Data File
VAT 3.0 normally does not require exporting the Real-Time Data file.
That is now a legacy workflow, but you may still use that workflow if you want to.
You definitely have to use the legacy workflow in order to apply VAT materials to
instanced meshes (ISM/HISM) or mesh particles.
You probably should use the legacy workflow if your animation spans a huge area.
1. On the VAT ROP, go to Advanced, turn on Support Real-Time Instancing.
2. Render your assets.
3. In the UE Material Instance, turn on Support Legacy Parameters and Instancing.
4. Enable all six parameters now appearing below Support Legacy Parameters and Instancing.
5. Follow their tooltip to batch-set their values (all six bound parameters share the same tooltip).
Notes:
1. VAT stands for Vertex Animation Textures.
2. ROP stands for a Houdini Render Operator, found in the /out network or any ROP Network node.
- UE


Lookup 포함 세가지 텍스쳐 모두 HDR 이미지, filter > Nearest 로 설정해줘야 한다


- 레벨에 배치할 때 Static으로 설정되어 있어야 함 (Movable 로 설정되어 있으면 계속 움직이는 현상이 발생한다)

- 꼭 MPC를 사용하지 않고도 StaticMeshComponent > Material Element를 생성해서 파라미터를 이용하는 방법이 있는 것 같다

https://www.artstation.com/artwork/zOyke6
https://www.sidefx.com/tutorials/vertex-animation-textures-for-unreal/
'UE > Houdini For UE' 카테고리의 다른 글
| Houdini Stylized Fire (0) | 2023.03.22 |
|---|---|
| UV Island 각각의 스케일을 줄여주는 방법 (3DS Max의 Uv Relax 대응) (0) | 2023.03.19 |
| 후디니에서 노멀맵을 베이크 하는 방법 (0) | 2023.03.19 |
| Static Mesh 뽑을 때 노말 (0) | 2023.03.19 |
| Mosaic 를 활용한 시퀀스 이미지 제작 (0) | 2023.03.19 |